Blazor is a client side framework utilizing web assemblies. Read more here
This article describes how to inject your own components on specific tagged ViewModelColumns. If you would rather like to blanket replace all or some standard components provided by us, read this: Blazor IComponentTypeSwitchBroker
Components for this framework must be built as Blazor web assembly components.
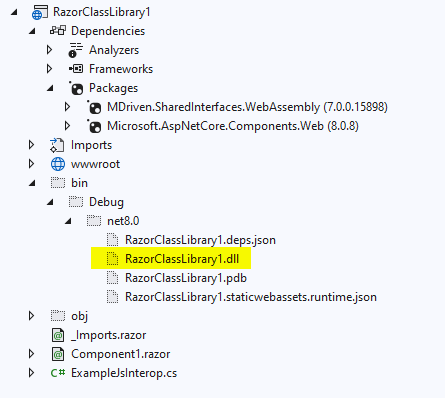
The assemblies you build end up in your bin folder with extension dll. You will also need to include the component in Blazor application, because when Visual Studio builds the application, it creates further variant files of your assembly that we will need.
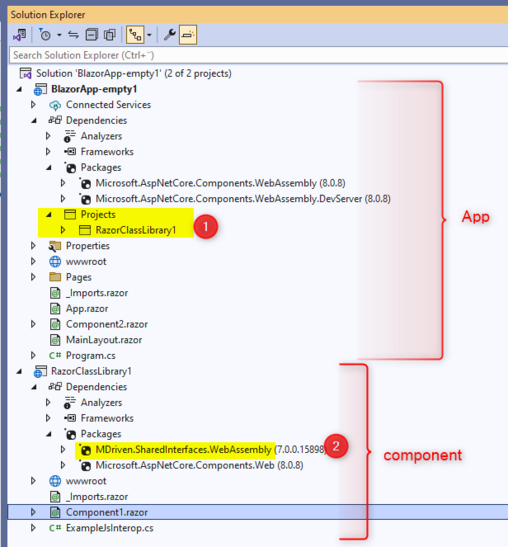
The App is pretty much an empty shell taken straight from the wizard in Visual Studio for the BlazorApp. We add a project reference to the RazorClassLibrary1 (1) project - this is the project that will produce the assembly with our Component1.
RazorClassLibrary1 was created from the wizard RazorComponent. The project makes use of the Nuget package: MDriven.SharedInterfaces.WebAssembly (2).
In order to be recognized as a full-worthy MDrivenTurnkey component, your component must have certain properties marked as Parameters. Copy and paste these into your new component (but even better if you make a Nuget reference to MDriven.Components.WebAssembly, and put @inherits MDCompBase in the start of your component file - then it will be work fully without adding the Parameters below):
@using System.Xml.Linq
@using MDriven.SharedInterfaces.WebAssembly
<div class="my-component">
    This component is defined in the <strong>RazorClassLibrary1</strong> library.
</div>

@code{
  [Parameter]
  public string CompType { set; get; }
  [Parameter]
  public XElement XElement { set; get; }
  [Parameter]
  public string BindInfoColumn { set; get; }
  [Parameter]
  public string BindInfoNesting { set; get; }
  [Parameter]
  public IVMClassObject ContextIVMClassObject { set; get; }
  [Parameter]
  public string RendersAction { set; get; }

  [Parameter]
  public string RendersActionThatUseAbstractAction { set; get; }


  /// <summary>
  /// If the component is used as a grid cell it should probably avoid rendering its label and such
  /// </summary>
  [Parameter]
  public bool IsGridCell { set; get; }

  [Parameter]
  public bool IsGridEditable { set; get; }

  [CascadingParameter(Name = "ViewClient")]
  public IViewClient? ViewClient { get; set; }

  [Parameter]  public string FlexStyling { get; set; }

}
When we compile our solution, we will find the assembly in the bin:
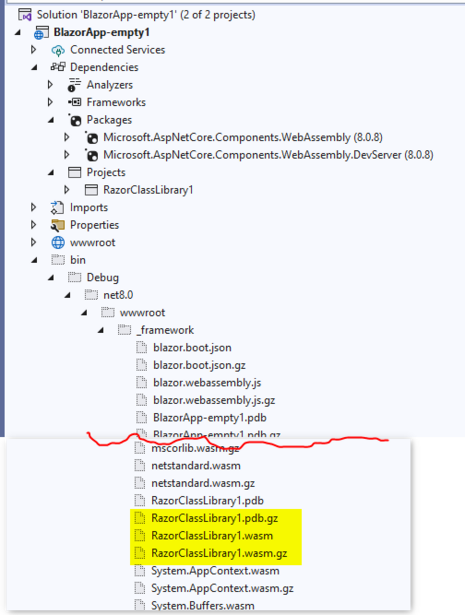
But we also need the files that are created when VS builds the application, in bin/debug/.net/wwwroot/_framework (these are files able to run on the client in browser context (web assembly), you MAY need to do a publish to get all the needed files created):
The wasm is the main web-assembly format, but we also want the wasm.gz - that is the gzipped wasm file - and this is what the Turnkey client will want to conserve bandwidth.
To get the dll's and wasm in the same folder (bin\Debug\net8.0), add to the _framework add this to app project:
<CopyLocalLockFileAssemblies>true</CopyLocalLockFileAssemblies>
( CopyLocalLockFileAssemblies tells MSBuild to copy all resolved NuGet package dependencies (including transitive ones) to the output directory during a regular build)
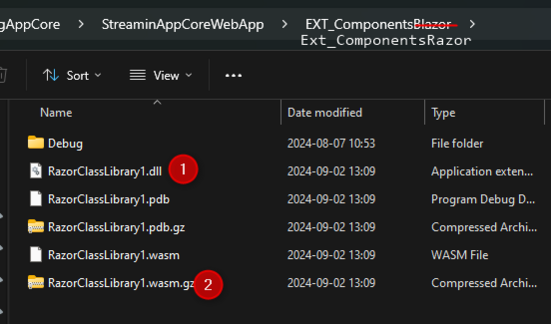
Copy these files into your Turnkey application/EXT_ComponentsRazor:
It is the number 1 & 2 files that are the important ones - one for when running serverside and the other for when running in the browser. This location is also scanned for *.js and *.css - and they are referenced in the blazor index page early in the load process.
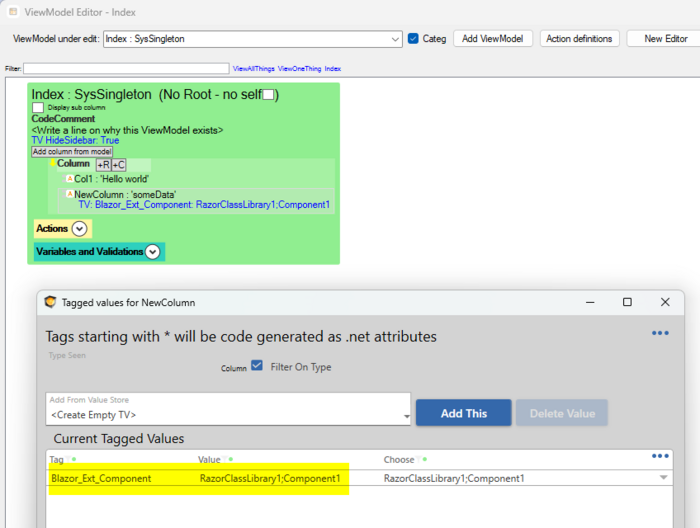
To use the component on a Blazor page in Turnkey, we set a taggedvalue "Blazor_Ext_Component" on the column where it should be rooted:
The value of the Blazor_Ext_Component tagged value must be formed like this:
AssemblyNameWithoutExtension;AdditionalAssemblyIfNeededWithoutExtension;AsManyAssembliesAsNeededWithoutExtension;TheTypeOfTheComponent
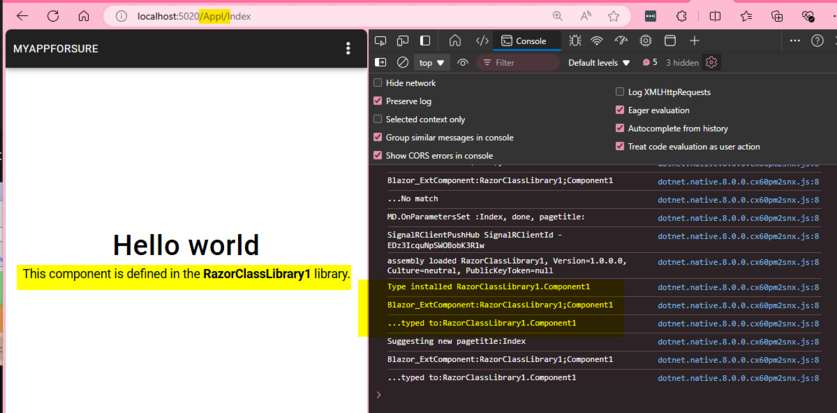
The component will now render on the page where we used it - check the console for any issues:
Advanced: When developing you will want to go back and forth a lot between your components project and the Turnkey test - to make it simpler you add the EXT_ComponentsRazorPath attribute to MDrivenServerOverride , and paths (semicolon separate multiple paths) will be search also , not just the default.
When razor components use scripts they are named component.razor.js - to simply development you can set the EXT_ComponentsRazorPathForJSScripts to the path (semicolon separate multiple paths) where script can be found. In runtime we will look for them in ./EXT_ComponentsRazor/CompName/script1.razor.js (same for js.map, ts and css)

